Seasons of life

The eagle eyed amongst you will notice the deplorable amount of time that has passed between me posting about my ‘waiting quilt’ and when I updated you on discovering who it was meant to be given to. *cough* nearly two years! *cough*.

I’m sorry. Once again I can only seek to reassure you that I have not abandoned either blogging or patchwork quilting. Both activities (like pretty much all other hobbies, self-indulgences, or relaxation time) simply take a back seat to the more clamouring demands of daily life with two young children. I snatch moments where I can for priority projects (that’s code for baby quilts for friends and family, emergency clothing repairs, other requests for fabric items from people I love) but not much else is possible. I know this is just a consequence of the season of life I’m in at the moment. I’m ok with that. I miss the tranquilty of patchworking and quilting but I wouldn’t give up the chaos and laughter that currently fills my days with Pip and Dot.

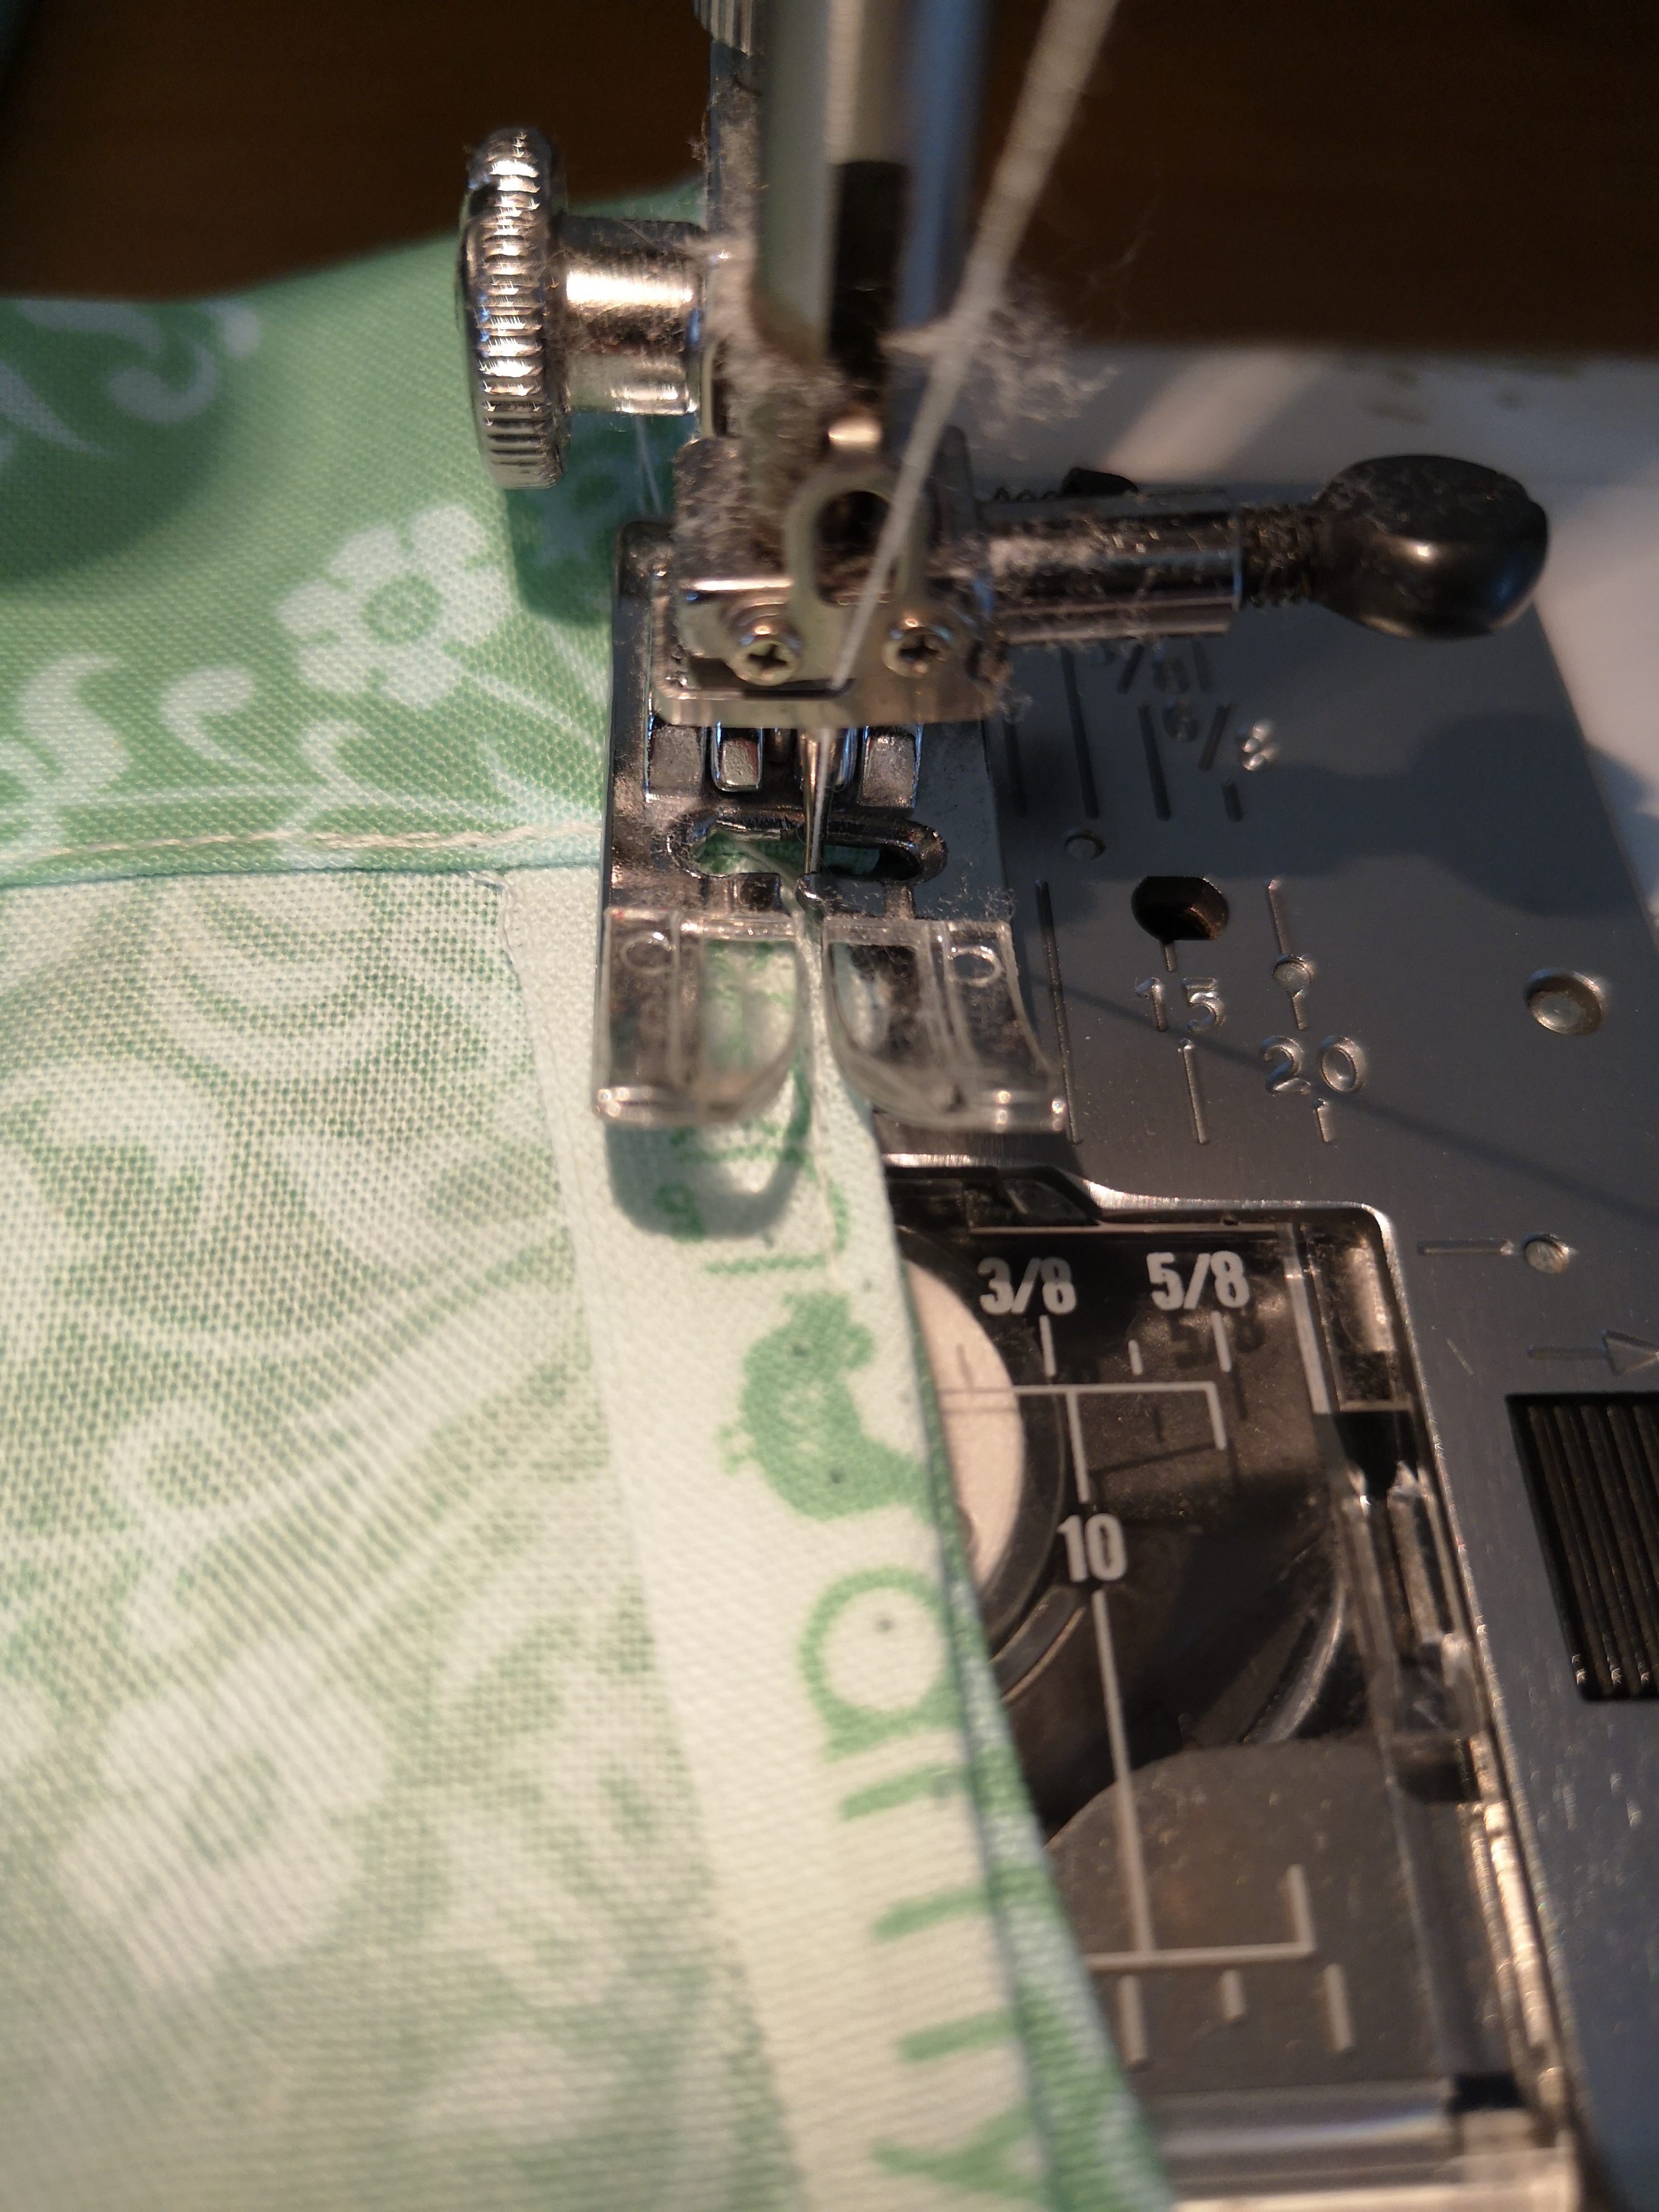
I’m really lucky that there is a corner of my bedroom where I can leave my sewing machine set up all the time. It’s not the best sewing setup, but having the machine out means that I see it (and think about possibilities) often, which helps make me feel like I’m still an active sewer, even when months go by before I use the machine. Having it out also means that the kids also see it and oftan ask to have a go. I say no more often than I would like because they usually ask at inconvenient times. But I’ve managed small amounts of machine sewing with both of them. With Dot, I’ve only done some decorative stitching on scrap fabrics, which she loves ‘helping’ with by pressing the button to move the needle to a resting up/down position. She’s only 2 and doesn’t have the patience for anything more involved.

Pip and I did manage to take a couple of hours recently to make a mini tote bag (10x12in) and a tiny cushion (3x4in). He was so proud of himself when he managed to control the foot pedal for a bit of it. I loved being able to share the joy of sewing with him.

The waiting quilt found a home

As is so often then way when let ourselves do what feels right in the moment, the universe fills in the rest of the pieces for us. Very soon after I finished my ‘waiting’ Beatrix Potter quilt, I found out who it was intended for. A very good friend of mine who I met when taking Pip to baby classes told me she was pregnant with her second, much longed for, child. I was delighted for her (obviously) and it just felt totally right that I’d been making a quilt for her baby without realising it. She’s an amazingly kind person with really strong personal sense of faith. I liked that my hand had been guided towards making the quilt for her baby.

It gave me great joy a few months later to hand it over when we met up when her son was about a month old. She even sent me some cute pictures a little while later as she felt the quilt made a nice background. Yay! I love it when quilts find the right home.

A quilt that is waiting

For Christmas 2021 my sister gave me a lovely little bundle of fat quarters. Some Beatrix Potter fabrics, co-ordinating ginghams, and a white with stars. Very pretty. A few months later I spotted another pretty little bundle of fat quarters with some flowery prints and ginghams that just sort of told me it needed to come home with me. When I put the two bundles next to each other they just matched so nicely that I knew they would be making a quilt together. But I had no urgent need for another quilt, nor any prospective recipient in the forseaable future so the fabric could just sit cosily in the cupboard until required.

Dot recently started nursery and I still had some time before I returned to work. The fabric began whispering to me from the cupboard. A pleasant few hours later I was honestly surprised to realise that I had a finished pieced top. Just equilateral triangles like my Uncle’s quilt, nothing fancy. I felt it suited the fabrics though because the triangles were large enough to allow the Beatrix Potter prints to show.

The backing fabric wasn’t pieced at all. I decided to use one of my Grandmother’s old bed sheets that has been stashed with my fabric since her death in 2014. It’s just been waiting for the right project to help out with. I must admit I was a bit lazy with my basting. Normally I pin and thread paste, but this time I just pin basted and hoped for the best.

One evening, a week or so later, an idea for a quilting pattern just occured to me. Simple straight (ish) lines that linked five petal flowers all over the quilt. It sort of echoed the type of flowers in one of the fabrics so I think co-ordinated well with the patchwork. On my next child-free day I, somewhat nervously, started in the middle of the quilt with my first column of flowers. Slowly I worked my way outwards towards the edge with each additional column of flowers, gaining confidence as I practiced. It would have been a fairly quick and simple job if my lazy basting hadn’t come back to bite me. Inevitably I had some fabric shifting towards the edges of the quilt resulting in large puckers in the backing fabric. Quite a lot of quilting needed to be ripped out and redone. Oops. Maybe that will teach me not to rush the basting. By the time I needed to collect the kids from nursery I had a fully quilted and trimmed quilt. It ended up a slightly unusal shape. A little longer and narrower than I expected. Not quite sure how I misjudged the dimensions while I was piecing the top. Just one of those things that happen when you’re playing with fabric without a clear goal in mind I suppose.

I thought about the binding for a few days and ended up choosing a dark blue and a dark green. They were leftovers from Dot’s quilt so I didn’t have enough of either to do the binding in just one colour. They really contrasted with the pale colours of the quilt, but still matched the tone.

This has possibly been my fastest quilt ever. It was such an intuitive, just going with my instincts, project. I don’t yet know what (or who) this quilt is destined for so it has no name or label and is back waiting patiently in the cupboard. Given that every other aspect of this quilt ‘just came’ to me, I’m content to wait until its recipient also ‘just comes’ to me.

Dot’s quilt

In the gap between lockdowns towards the end of summer 2020, my (then heavily pregnant) sister came to visit us to collect all our baby gear. As we loaded innumerable bags of clothes, blankets, plastic gadgets and containers into the car, I casually mentioned that I’d need most of it back in about 7 months. The look of utter confusion gradually morphing into surprised delight on my sister’s face as she slowly realised the implications of my comment is a mental image that still make me smile even now as I think of it.

This pregnancy was codenamed Little Dot. I was determined that, whatever else may happen in the world and in our lives, Dot would also have a quilt to open as a first Christmas present just like big brother Pip had done. To make that goal more achievable given the reduction in my available sewing time since I first became a parent, I decided to start from a pre-existing pattern rather than fully designing it from scratch myself. I really like Elizabeth Hartman’s patterns. I’ve made her fire drill quilt and her weekender bag before. In fact I’ve just searched through my blog to try and link to them and I’ve realised they are missing! I don’t know why I didn’t blog about them as I finished them. So remiss of me. I’ll have to ask my bother to take some pictures of the Fire drill quilt so I can post about it soon. But I digress…

I like Elizabeth Hartman’s style, and I know her pattern writing approach makes sense to me. So down the internet browsing rabbit hole I vanished once more. This time emerging with her Fancy Forest quilt pattern. A bit of time spent image searching and I found a few variations on the pattern that appealed to me. I liked the idea of trees rather than thistles for the plant blocks. I also liked some of the floating borders I saw in online images, so I wanted to try and include that element. Design broadly sorted, I moved onto fabric shopping. So much fun!

This was a remarkably smooth quilt to put together. My piecing certainly improved as I practiced. Those first couple of rabbit blocks have some seriously wonky seam allowances. I did have some fun playing with layout options. In the end I chose to position blocks close to others of a similar colour. I think it helped the overall flow of the design.

Before Dot was ready to join the world, the top and back were fully pieced and I had embroided all of the label except for the name. It was as far as I could get without actually having the baby.

Dot duly arrived safely (though late, just like her big brother). She has fitted into the family very smoothly and all of us dote on her (Pip especially adores her, which just melts my Mama heart). With her name confirmed, I could continue work on the quilt.

Unusually for me I actually really liked the quilting part of this project. I decided to go for an all over wood grain effect. I also quilted more densely than I have done in the past. Maybe my dislike of quilting actually only applies to when I’m trying to match the quilting around the patchwork. Certainly the almost meditative qualitites of quilting Dot’s quilt were extremely enjoyable. It felt like it was over too soon. There’s something I never thought I’d say about quilting (especially after the Japanese Sampler Quilt). Ready in time for Christmas, just as I’d promised myself.

Time to make a baby quilt

Over the next few months I’m going to try and catch up with the reports of my quilting exploits over the last couple of years. I haven’t been massively productive, but I have consistently been working on various projects I’d like to update you on…

Shortly after Covid struck and the UK went into its first Lockdown, my sister announced she was pregnant with her first child. After informing her that she was welcome to all of our baby paraphenalia (Pip had just turned 2 years old), I think my next comment was to ask what colours she wanted for her baby quilt. I’m not sure I gave her the option of not having a quilt. I was far too excited at the thought of being an Auntie and having someone new to bestow a quilt upon.

She opted for a yellow and grey theme and told me she wanted everything else to be a surprise. So I had free reign to do as I pleased. A couple of yellow and grey themed jelly rolls purchased online later and I was merrily hunting for pattern inspiration. I wanted something busy and fun (that would work with the thin strips from the jelly roll). The problem with writing this blog post so retrospectively is that I can’t now remember exactly what my thought process was or what websites I drew specific inspiration from. However, it was along the lines of a hexagon block (with this as a sort of inspiration) with a spider’s web block element to it (this type of thing).

I dutifully organised all my jelly roll strips into sets of threes and stitched them together and cut them up into triangles to make my hexagons. Except that was when I discovered my jelly rolls weren’t quite long enough to give me six identical three-stripe triangles to make the hexagons, bother. When I laid out the sections to check the pattern I realised that, with only two main colours, the three stripe hexagons looked far too busy. It was so frustrating. When sewing, the only thing I hate more than realising my design isn’t going to work, is wasting fabric. I’d done both. No photos exist of this disapointing state of affairs.

To recover from my disheartening setback I spent some time gently embroidering one of the little Thumper rabbits on some black and white disney fabric I found in my stash. It felt like a nice, gentle and personal detail for the quilt. I also found some nice co-ordinating fabics leftover from Pip’s quilt (Winnie-the-Pooh and Elephants). Knowing I now had the sentimentality factor sorted I felt able to continue work on the quilt.

This time things worked out much more smoothly. I dropped the third stripe from the triangles and I bought a wider range of plain yellow fabrics to balance busy prints. This reduced the complexity of the quilt to a level where it still had the fun, scrappy feel I wanted, but now had some coherence and flow to the hexagons. I used the plain yellow fabrics to design a pieced back to the quilt, not something I usually do.

I went simple with the quilting, just echoing the lines of the hexagons.

I did take a small moment to congratulate myself on finishing the quilt just before my sister’s due date. So a couple of weeks later I added the label (also hexagons) and posted the quilt off to its intended recipient.

Now Covid just needed to piss off so I could actually go and meet him…

When my nephew was 6 months old I was able to meet him in person for the first time. I’m glad I posted the quilt off as soon as it was ready rather than waiting. As you can imagine, it was incredibly special when I was finally able to hold him.

Drawstring bags for hospital staff

Drawstring bags for hospital staff

I’m about a year late writing this post. You’ll notice there hasn’t been much action at all on my blog for about a year. We’ll just chalk that up to the global year of crazy that was 2020.

The first item of sewing to report is my own very small effort towards the ‘national effort’ during the first UK lockdown that started on 23rd March 2020. I joined a county based online sewing group that was making masks, scrubs and clothing bags for hospital staff. I raided my linen closet and fabric stash and pulled out lots of old bed linen and larger fabric scraps. Then I set to work. I decided to concentrate on drawstring clothing bags that the workers could put their work clothes in at the end of a shift and then just throw straight in the washing machine when they got home. The logic was that this would limit contamination.

Stack of finished drawstring bags
Finished bags

I experimented a bit with finding the most efficient way of making the bags. I’ve used a lot of techniques for drawstring bags over the years, but here I was going for strength and speed. It was quite fun figuring out a new technique and then running off lots of the same pattern. Normally I only make one (maybe two) of something when I design it.

Image 1
Image 1
Image 2
Image 2
Image 3
Image 3
Image 4
Image 4
  1. First, choose your size of the bag and cut out fabric appropriately. For these hospital bags I was aiming for something close to a pillowcase size. For some of mine I had two pieces of fabric (one for each face of the bag) to join together. For others, I had one large piece that could fold to save me one of the edge seams.
  2. Work out which edge of the fabric will be the top of the bag and will have the drawstring on it. At each end of that edge, you need to create an opening for the drawstring. To do this first measure a rough 1/4″ from the top edge (this will be your turned hem), then 1 1/4″ for the drawstring channel. Press creases at both these marks along the full length of the top edge (See image 1)
  3. At each end, turn over roughly 1/4″ and stitch it in place. This is to ensure that the openings of the drawstring channels don’t have raw edges when you’re finished. (See image 2)
  4. Along the top edge, fold over the 1/4″ for the turned hem. Then fold over the 1 1/4″ for the drawstring channel. Stitch the channel along the length of the top edge, as close to the folded edge as you are comfortable stitching reliably. (See images 3&4)
  5. Now it’s time to sew the sides and bottom of the bag together: Put the two channel openings right side together. Insert your needle close up to the very edge of the turned hem at the bottom of the channel opening (from step 3). Do a couple of forwards and backwards stitches to secure that point. (See image 5)
  6. While the inserted needle is securing your starting point, gently open out the turned edges over the course of a couple of inches. As you begin sewing in a straight line, you’ll transition from sewing at the edge of a turned hem to sewing a raw edge with a rough 1/4″ seam allowance. (See image 6)
  7. Keep sewing all the way down to the bottom of the bag and also complete the other two sides as required. Turn the bag the right way out. Your channel openings should look like image 7.
  8. To reinforce the seams, add zigzag stitching within the seam allowance
  9. To reinforce the point where the two channels join, topstitch a triangle to help ensure it doesn’t come apart when used. (See image 8)
  10. Thread the drawstring through the channel using a safety pin as an easy guide to push through. Tie off the two ends. Done!
  11. Repeat and repeat and repeat until you run out of fabric or the group organisers tell you they have enough donations to meet demand
Image 5
Image 5
Image 6
Image 6
Image 7
Image 7
Image 8
Image 8

It was a simple fun project that helped me feel just the tiniest bit useful at a time when I was unable to get any of my work done because I was looking after a two year old and trying to help my very busy front line husband relax a little when he did get some rare time off.

I can’t actually remember how many bags I made in total. That’s the problem with delaying a blog post for a year I suppose. But at least I did take a couple of photos of the finished stack before I went to drop them off.

Fan of finished bags
Fan of nearly finished bags just waiting for some more draw string tape to arrive so I can change of the garden twine that is currently being used

Finished Japanese Sampler Quilt

It’s done! What a mission this quilt was to complete, but I’m pleased with how it turned out. It feels like a totally different style from my previous quilts. I learnt loads of new techniques and stretched my design muscles a bit.

You can read the journey of this quilt through my blog posts. They are all categorised ‘Japanese quilt’. The easiest way I’ve found to filter a category is to click on it at the end of a post. Just scroll down to find the categories for this post.

I loved designing and making the blocks for this quilt. The combination of the different pieced blocks and the sashiko elements was just thrilling. I started work on it in April and had a finished flimsy by August (just 5 months).

The quilting was a very different story. I really tried to push myself with this quilt. I designed quilting patterns to accentuate each block and help me practice different techniques. However, by the time I was half way through I was sick of it. The quilting designs got simpler, my tolerance for imprecision got greater, I just wanted it to end. Its such a contrast to how I feel when I’m piecing. Quilting took 2 years 7 months because I didn’t look forward to doing it. Instead I jumped to other projects and left this one languishing.

Pip couldn’t resist playing with the hanging quilt.

Given how little time I have for sewing these days, it seems daft to spend that time doing something I don’t love. I think I need to seriously investigate finding someone else to quilt my tops. I think I’d have more fun, and be more productive, if I concentrated on what I enjoy doing. What are your views on letting someone else quilt your patchwork?

So close to being finished…

Ahhhh!

I really wanted to post a finish this week. I started work on my Japanese Sampler quilt back in 2017. I had been making steady progress with it before pregnancy and all things baby took over my life and I switched to Pip’s I Spy quilt and various nursery furnishings.

The last you heard from me about my Japanese quilt was that the top was finished, everything was basted and it was ready to quilt. That was back in Aug 2017. I have been doing little bits of quilting on it every now and then in between making items for Pip.

I find it really hard to take decent photos of quilting so I didn’t plan on blogging about the Japanese quilt again until it was finished. I just didn’t expect it to take nearly 3 years to get there.

Getting the sewing room set up in the new house really spurred me on to try and make progress with this quilt. It felt like a great project for something that reminded me of who I was before I was Mama. I made great progress. Last month I finished the quilting. Last week I made the binding. Yesterday I got one side of the binding stitched down. This evening I made the label. I felt confident enough that I was close to finishing to put a date on it. Surely I’ll be finished before 2020 ends?!

And just as I was about to start the final side of the binding… Coughing, spluttering and crying could be heard over the baby monitor. Pip’s latest cold disturbed his sleep and ended my headlong dash towards a finished quilt.

Oh well. Hopefully I’ll get back to the sewing machine before my label is out of date.

Some bags for my Didymos woven wraps.

Top of my to-do list for the new sewing room were some bags to store the baby carriers and wraps I have accumulated since Pip turned my life upside down in the best way possible.

I love baby wearing. It’s so convenient, so snuggly, and so much fun learning all the different ways you can keep a baby comfortable, safe and secure with just a long length of fabric.

I’ve posted before about making a couple of bags for my wraps. Since then my collection has expanded, so obviously some more bags were needed.

I like trying different brands and types of wraps. I buy most of my wraps second hand, many arrive, get tried and then get sold again. Only ones that fill a niche and make me smile join my permenant collection. The only brand for which I have more than one wrap is Didymos. I kept finding I loved the look, feel, and features of their wraps. It was time to give my Didymos beauties some cosy bags to live it.

First my size 4 didymos Doubleface Robert. It is a beautifully lightweight 100% cotton wrap that is grey on one side and pale blue on the other.

For the bag I chose two fat quarters of polkadot, one blue and one grey for each side. I like the bags to echo the look of the wrap so I easily know what I’m grabbing when I pick up a bag.

Second was a bag for my size 3 Didymos Doubleface Jack. This is another lightweight 100% cotton wrap, this time red on one side and black on the other. I find the Doubleface wraps just so incredibly useful and easy to work with. Fab in hot sticky summer weather, especially short lengths like this one.

For the bag I added black strips to both vertical edges of the main red fabric. Again, getting the bag to match the wrap it holds.

The most recent addition to my collection is technically not a wrap. It’s a meh dai, which uses wrap fabric in a panel with a waist strap and two long shoulder straps that you then wrap around. My meh dai is made from Didymos Fairytale fabric, which is a really pretty pattern. My love for Didymos wraps began with Fairytale when my cousin kindly loaned me her size 3 Fairytale wrap.

It was so easy to wrap with, but I didn’t want to damage it because I knew it was special for her daughter, so I didn’t use it as much as it deserved. That started my hunt through the Didymos back catalogue for similar wraps. It makes me so happy to have a Fairytale of my own now as well.

I found a paisley fabric in my stash that I have had for ages. In colouring it was pretty close to the fairytale colours, but lacked the blue, so I added a strip of solid blue fabric to the bottom of the bag so that the wrap colours were more fully represented. I felt very happy to have been able to use a piece of long hoarded scrap fabric for this bag.

I still have a few wraps waiting for their bags (and some that came with bags from the manufacturer so don’t require my sewing machine). Once they are all bagged up I’ll share a full wrap stash shot with you. It makes me smile that the wrapping community share the terms stash with the sewing community to refer to the precious precious fabric collections we curate.

Here are the wraps I have made bags for so far.

New sewing room.

I’ve now finished setting up the sewing room in our new house. It’s a combined sewing and home office space.

Archer the dog certainly approves. He can often be found curled up in here snoozing away.

This is the one room in the house we really try and keep Pip out of. That gets harder and harder now that he is running, climbing and reaching door handles. So I have organised things to be as child proof as I could. All my loose items are higher up and the cube storage is currently too heavily filled for Pip to manage to move.

I really like the feel of my new little hidey hole. Now I just need to get some time to do some sewing in it.

If you were wondering where my fabric stash has gone. Don’t panic. It’s hiding in this cupboard just behind the door to the room. We’d lived here for a fortnight before I even discovered this cupboard. Very useful though.